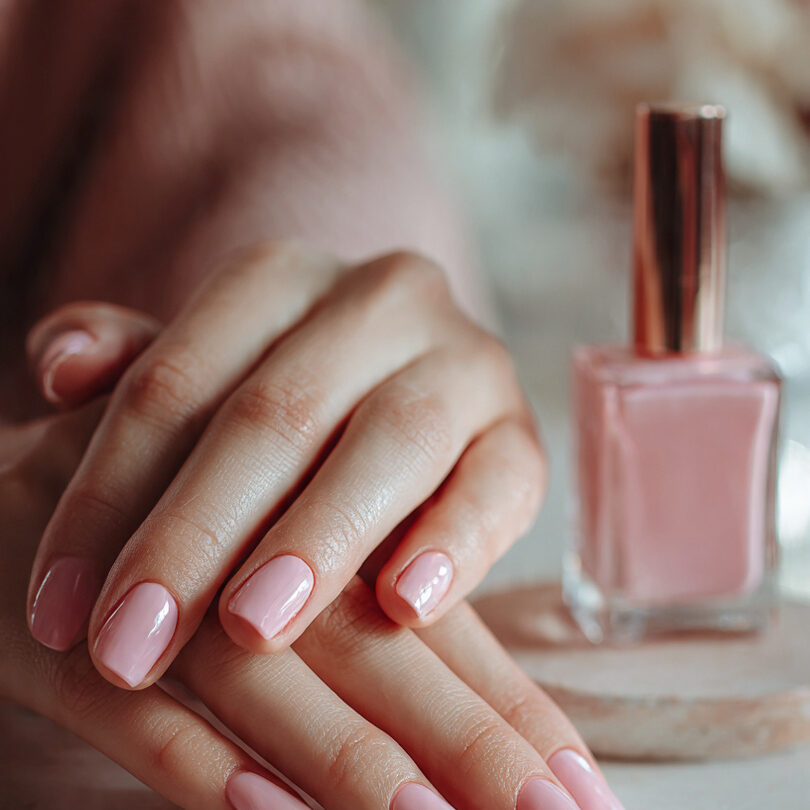
Beautifully painted nails can instantly elevate your appearance, boost confidence, and become a creative form of self-expression. Whether you prefer timeless nude shades, bold reds, glossy black, or intricate nail art, learning how to paint your nails properly can help you achieve salon-quality results at home.
The Ultimate Guide to Painting Your Nails: Learn step-by-step nail painting tips, tricks, and techniques for achieving a smooth, long-lasting salon-quality manicure at home.
This ultimate guide covers everything you need to know about painting your nails—from preparing your nails and choosing the right tools to mastering flawless application techniques and making your manicure last longer.
Whether you’re a beginner or someone looking to improve your Painting Your Nails game, this guide will help you create healthy, polished, and long-lasting nails.
Why Nail Painting Is More Than Beauty
Painting your nails is not just about aesthetics. It can also:
- Improve self-confidence.
- Reflect your personality and mood.
- Encourage self-care routines.
- Protect nails from minor breakage.
- Add elegance to your overall appearance.
For many people, nail care is relaxing and therapeutic. Taking time to care for your nails can feel like a mini spa session at home.
Understanding Nail Anatomy
Before painting your nails, it helps to understand the basic structure of the Painting Your Nails.
Nail Plate
The hard, visible part of the nail.
Cuticle
The thin layer of skin protects the nail root from bacteria.
Nail Bed
The skin beneath the nail plate.
Lunula
The pale crescent shape is located close to the nail’s base.
Healthy nails provide the perfect base for smooth polish application.
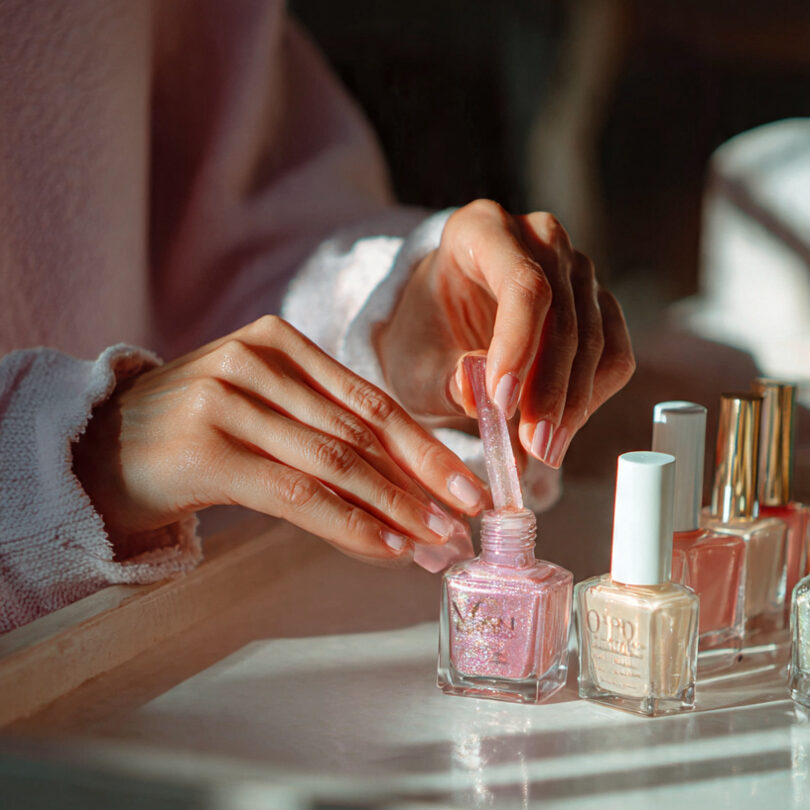
Essential Nail Painting Tools
Having the right tools makes a huge difference.
Nail Polish Remover
Removes old polish and cleans the nail surface.
Acetone Remover
- Works quickly
- Best for glitter polish
- Can dry nails
Non-Acetone Remover
- Gentler on nails
- Better for dry or brittle nails
Nail Clippers
Use sharp nail clippers to shape nails evenly.
Nail File
A Painting Your Nails file smooths rough edges and shapes nails.
Popular Nail Shapes
- Round
- Square
- Oval
- Almond
- Coffin
- Stiletto
Beginners often find round or oval shapes easiest to maintain.
Buffer Block
Buffers smooth ridges and create a polished surface.
Avoid over-buffing because it can weaken nails.
Cuticle Pusher
Used to gently push back cuticles for a cleaner manicure.
Base Coat
A base coat:
- Protects nails from staining.
- Helps polish adhere better.
- Increases manicure longevity.
Never skip this step.
- Nail Polish
Choose formulas based on your needs.
- Cream Polish
Classic smooth finish.
- Matte Polish
Non-shiny modern look.
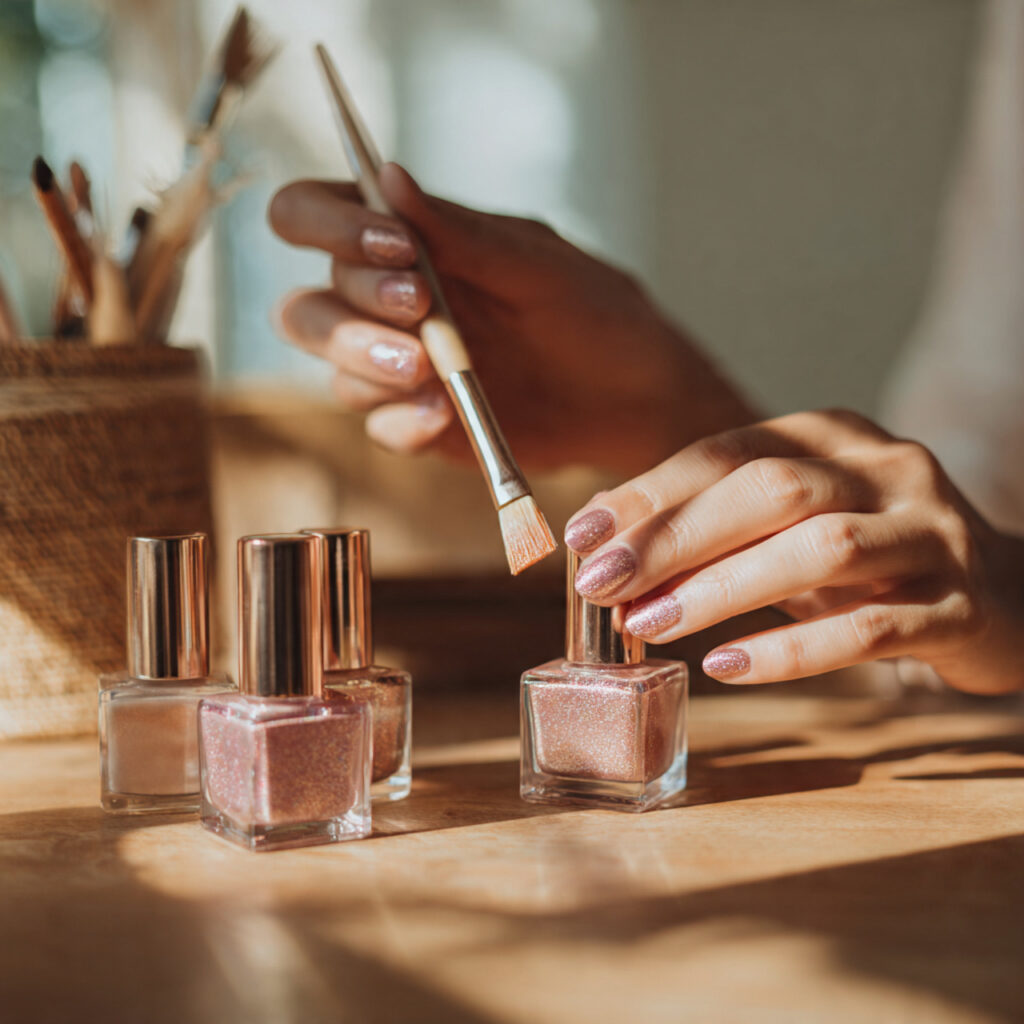
- Glitter Polish
Perfect for glam manicures.
- Gel Polish
Long-lasting but usually requires UV or LED curing.
- Quick-Dry Polish
Ideal for busy schedules.
Top Coat
A top coat:
- Adds shine
- Prevents chipping
- Seals nail art
- Extends wear time
Cuticle Oil
Hydrates nails and the surrounding skin.
Cotton Pads and Cleanup Brush
Useful for correcting mistakes and cleaning edges.
Preparing Your Nails Properly
Preparation is the secret to salon-quality Painting Your Nails.
Step 1: Remove Old Polish
Completely remove old polish before starting.
Even tiny leftover bits can make the new manicure uneven.
Step 2: Wash Your Hands
Clean nails remove oils, dirt, and bacteria.
Dry thoroughly afterward.
Step 3: Trim and Shape Nails
Choose your desired nail shape and file carefully in one direction.
Avoid aggressive sawing motions because they can split nails.
Step 4: Soak Nails
Immerse nails in warm water for several minutes to loosen cuticles.
You can add:
- Mild soap
- Olive oil
- Epsom salt
Step 5: Push Back Cuticles
Gently push cuticles back using a cuticle pusher.
Do not cut cuticles aggressively because they protect against infection.
Step 6: Buff the Nail Surface
Light buffing smooths ridges and improves polish application.
Step 7: Clean the nail plate.
Use Painting Your Nails remover or rubbing alcohol to remove oils before painting.
This step helps polish for longer.
How to Choose the Perfect Nail Polish Color
Choosing the right shade depends on:
- Skin tone
- Occasion
- Season
- Personal style
Best Shades for Fair Skin
- Soft pink
- Nude beige
- Lavender
- Cherry red
Best Shades for Medium Skin
- Coral
- Rose
- Teal
- Berry tones
Best Shades for Dark Skin
- Metallic gold
- Deep plum
- Emerald green
- Bright orange
Seasonal Nail Color Ideas
Spring
- Pastels
- Floral shades
- Soft peach
Summer
- Neon colors
- Bright pink
- Turquoise
Autumn
- Burnt orange
- Brown
- Burgundy
Winter
- Deep red
- Silver
- Navy blue
Step-by-Step Guide to Painting Your Nails
Now comes the fun part.
Step 1: Apply Base Coat
Apply one thin layer of base coat.
Why thin?
Heavy coats require more time to dry and could develop bubbles.
Allow it to dry completely.
Step 2: Apply the First Coat of Polish
The first coat of color should be thin and even.
The Three-Stroke Method
- Place the brush slightly above the cuticle.
- Push gently toward the cuticle
- Pull down the center
- Paint each side
This creates even coverage.
Step 3: Apply the Second Coat
The second coat intensifies color and smooths streaks.
Wait until the first coat is mostly dry before applying.
Step 4: Seal With Top Coat
A top coat locks everything in place.
Apply it carefully over the nail tips, too.
This technique is called “capping the free edge” and helps prevent chipping.
Step 5: Clean the Edges
Soak a cleanup brush or cotton swab in remover and tidy up the areas around the Painting Your Nails edges.
This gives a professional finish.
How to Dry Nail Polish Faster
Smudging fresh nails is frustrating.
Here are ways to speed up drying:
- Use Thin Layers
Thin coats dry much faster than thick ones.
- Quick-Dry Top Coat
Special formulas reduce drying time significantly.
- Cold Water Method
After nails become touch-dry, dip them into cold water for a minute.
- Nail Drying Sprays
These help harden polish quickly.
- Avoid Heat
Hot air can cause bubbles.
Common Painting Your Nails Mistakes
Applying Thick Coats
Thick polish:
- Smudges easily
- Chips faster
- Takes forever to dry
Thin layers are best.
Skipping Base Coat
This can:
- Stain nails
- Reduce longevity
Shaking the Bottle
- Shaking creates bubbles.
- Instead, roll the bottle between your hands.
Painting Wet Nails
- Moisture prevents polish from adhering properly.
- Always dry nails completely first.
Ignoring Cuticle Care
Dry cuticles make manicures look messy.
How to Make Your Manicure Last Longer
- Wear Gloves During Cleaning
Chemicals and water weaken the polish.
- Reapply the top coat.
Adding another top coat every few days extends wear.
- Moisturize daily.
Hydrated nails are less likely to crack.
- Avoid Using Nails as Tools.
Opening cans or scratching surfaces damages the polish.
- Keep Nails Shorter
Short nails often chip less than very long Painting Your Nails.
Beginner-Friendly Nail Art Ideas
You do not need professional skills to create beautiful nail art.
- Polka Dots
Use a toothpick or dotting tool.
- French Tips
Classic and elegant.
You can use tape guides for cleaner lines.
- Ombré Nails
Blend two colors using a makeup sponge.
- Glitter Accent Nail
Paint one nail with glitter for a stylish look.
- Minimalist Lines
Simple geometric lines look modern and chic.
Popular Nail Polish Finishes
- Glossy Finish
Traditional shiny appearance.
- Matte Finish
Velvety non-shiny look.
- Metallic Finish
Reflective chrome-like effect.
- Jelly Finish
Translucent glossy appearance.
- Holographic Finish
Rainbow light reflection effect.
Gel Nails vs. Regular Nail Polish
Regular Nail Polish
Pros
- Easy to remove
- Affordable
- No UV lamp required
Cons
- Chips faster
- Shorter wear time
Gel Nail Polish
Pros
- Extremely durable
- High shine
- Lasts 2–3 weeks
Cons
- Requires UV/LED lamp
- Removal may weaken nails if done improperly
How to Remove Painting Your Nails Properly
Improper removal can damage nails.
For Regular Polish
- Soak a cotton pad with remover.
- Press onto the nail.
- Wipe gently.
For Glitter Polish
Hold remover-soaked cotton on the nail for several seconds before wiping.
For Gel Polish
- File the top layer gently
- Soak cotton in acetone
- Wrap nails with foil
- Wait 10–15 minutes
- Remove softened gel carefully
Never peel gel polish off forcefully.
Nail Care Tips for Healthy Nails
Healthy nails make polish look better.
Moisturize Frequently
Use:
- Hand cream
- Cuticle oil
- Natural oils
Eat Nutrient-Rich Foods
Nails need:
- Protein
- Biotin
- Iron
- Zinc
- Omega-3 fatty acids
Stay Hydrated
- Dry nails break more easily.
Give Nails Breaks
- Occasional polish-free days help reduce dryness.
Avoid Harsh Chemicals
- Limit exposure to strong detergents and acetone.
Signs of Unhealthy Nails
Consult a healthcare professional if you notice:
- Severe discoloration
- Thickening
- Separation from the nail bed
- Persistent brittleness
- Pain or swelling
Sometimes nail issues indicate underlying health problems.
Best Nail Shapes for Different Hands
- Short Fingers
Oval and almond shapes create a longer appearance.
- Wide Nail Beds
Round or oval shapes soften the width.
- Long Fingers
Square nails can look elegant and balanced.
DIY Manicure vs. Salon Manicure
DIY Manicure Benefits
- Budget-friendly
- Convenient
- Creative freedom
Salon Benefits
- Professional precision
- Advanced nail art
- Relaxing experience
How Often Should You Paint Your Nails?
There is no strict rule.
Many people repaint every
- 5–7 days for regular polish
- 2–3 weeks for gel polish
If Painting Your Nails become weak or dry, take a short break from polish.
Nail Trends to Try
- Chrome Nails
Mirror-like shine.
- Milky Nails
Soft, semi-transparent nude look.
- Velvet Nails
Magnetic shimmer effect.
- Soap Nails
Clean, glossy, natural nails.
- Micro French Tips
Ultra-thin French manicure lines.
Safe Nail Practices
- Avoid Excessive Filing
Over-filing weakens nails.
- Do Not Share Nail Tools
This reduces infection risk.
- Sanitize Tools Regularly
Especially after cuticle work.
- Use UV protection.
If using gel polish often, apply sunscreen to your hands before UV exposure.
Natural Alternatives to Traditional Nail Polish
Some people prefer more natural products.
Water-Based Nail Polish
- Lower odor
- Easier removal
Breathable Nail Polish
Allows some air and moisture exchange.
Non-Toxic Formulas
Look for:
- 5-free
- 7-free
- 10-free formulas
These avoid certain harsh chemicals.
Building a Simple At-Home Nail Kit
A beginner nail kit should include the following:
- Nail clippers
- Nail file
- Buffer
- Cuticle oil
- Base coat
- Top coat
- Neutral polish
- Red polish
- Nail polish remover
- Cleanup brush
Tips for Painting Nails With Your Non-Dominant Hand
This is difficult for many beginners.
Stabilize Your Hand
Rest your elbows on a flat surface.
Move Your Finger Instead of the Brush
This gives better control.
- Use Wider Brushes.
They provide smoother coverage.
- Practice Often
Skill improves over time.
How to Fix Smudged Nails
Accidents happen.
- Small Smudge Fix
Lightly lick or dampen a fingertip and smooth gently.
- Larger Smudge Fix
Apply another thin coat and top coat.
The Psychology of Nail Colors
Colors can affect mood and perception.
Red
- Confidence and glamour.
Nude
- Elegance and simplicity.
Black
- Bold and edgy.
Blue
- Calm and creative.
Pink
- Soft and feminine.
- Choose shades that match your mood and personality.
Creating a Relaxing Nail Routine
Turn your manicure into self-care.
Set the Mood
- Play music
- Light candles
- Watch a favorite show
Practice Mindfulness
Focus on the process and enjoy the moment.
How to apply minoxidil to nails?
Minoxidil is primarily designed for scalp hair growth, not for nails. However, some people experiment with applying it around the nails to support nail growth or improve brittle Painting Your Nails. There is limited scientific evidence for nail use, so it’s best to speak with a dermatologist before trying it regularly.
How to Apply Minoxidil to Nails
Step 1: Clean Your Nails
Wash your hands thoroughly and remove any Painting Your Nails, oils, or creams so the product can absorb properly.
Step 2: Use a Small Amount
Apply a tiny drop of minoxidil solution or foam to the following:
- The nail bed
- The cuticle area
- Around the sides of the nail
Do not soak the entire finger.
Step 3: Massage Gently
Rub it in carefully using a clean fingertip or cotton swab for about 20–30 seconds.
Step 4: Let It Dry
Allow the product to dry completely before touching water or applying other products.
Step 5: Moisturize
Minoxidil may dry the skin around the Painting Your Nails, so apply cuticle oil or hand cream afterward once it has dried.
Important Safety Tips
- Avoid broken or infected skin
- Do not apply excessively.
- Wash your hands after application.
- Stop use if irritation, redness, or peeling occurs.
- Keep away from the eyes and mouth
Can Minoxidil Actually Help Nails?
Some small reports suggest minoxidil may:
- Increase blood circulation
- Support nail growth speed
- Improve brittle nails
But research is limited, and results vary.
Better Proven Ways to Strengthen Nails
Instead of minoxidil, dermatologists usually recommend:
- Biotin supplements
- Cuticle oil
- Painting Your Nails strengtheners
- Protein-rich diet
- Avoiding harsh chemicals
- Keeping nails moisturized
If your nails are severely brittle, peeling, or not growing, it may be linked to nutritional deficiencies or medical conditions.
Is it unhealthy to always wear nail polish?
Wearing nail polish all the time is not necessarily unhealthy, but constant use without breaks can sometimes lead to dry, weak, or stained nails—especially if you frequently use harsh removers or gel manicures.
Possible Effects of Constant Nail Polish Use
- Dryness and Brittleness
Frequent polish removal, especially with acetone, can strip natural oils from the Painting Your Nails and surrounding skin.
- Yellow Staining
Dark Painting Your Nails shades may stain nails if you skip a base coat.
- Weak or Peeling Nails
Continuous gel polish, acrylics, or aggressive filing can thin the nail surface over time.
- Allergic Reactions
Some people react to ingredients in nail polish or removers, causing redness or irritation.
Is It Okay to Wear Regular Nail Polish Continuously?
For most people, yes—if you practice healthy nail care.
- Use a base coat
- Moisturize cuticles regularly
- Avoid peeling polish off.
- Use a gentle remover when possible.
- Give nails occasional breaks if they feel dry or weak.
Gel and Acrylic Nails Need More Caution
Frequent gel manicures or acrylics can
- Weaken nails
- Cause thinning
- Increase brittleness
- Damage to the nail plate during removal
Taking breaks between gel sets can help Painting Your Nails recover.
Signs Your Nails Need a Break
Consider going polish-free for a week or two if you notice the following:
- Peeling
- Splitting
- White patches
- Excessive dryness
- Pain or sensitivity
Tips for Healthier Nails While Wearing Polish
- Apply cuticle oil daily
- Wear gloves while cleaning
- Keep nails trimmed
- Avoid using nails as tools
- Choose non-toxic or “5-free” polish formulas.
- Eat enough protein, iron, and biotin-rich foods.
Healthy Painting Your Nails can usually tolerate regular nail polish use, but balance and proper care are important.
Read more: Can you dye synthetic hair?
Final Thoughts
Painting your nails is both an art and a form of self-care. With the right tools, preparation, and techniques, anyone can achieve salon-worthy nails at home. From choosing flattering colors to mastering smooth application and caring for nail health, every step contributes to a beautiful and long-lasting manicure.
Remember that perfection comes with practice. Even professional nail artists started as beginners. Experiment with colors, shapes, finishes, and Painting Your Nails art styles until you discover what makes you feel confident and stylish.
Healthy nails combined with proper painting techniques can transform your manicure routine into an enjoyable beauty ritual. Whether you love minimal nude nails or bold statement designs, your nails can become a creative expression of your personal style.